Affiliate Disclosure: Some links in this guide are affiliate links. If you purchase through them, we may earn a small commission at no extra cost to you. Read our full affiliate disclaimer here.
By King James Adjei — Researcher and Goldendoodle enthusiast, founder of GoldendoodleReport.com. Every guide on this site is carefully researched and written to give owners reliable, clearly organised information — updated regularly and honest about uncertainty. → About this site
📖 9-minute read | Last updated April 2026 | Reviewed for accuracy
Knowing how to trim a Goldendoodle at home correctly is possible — but only in specific areas and with a realistic understanding of what can be achieved safely versus what should be left to a professional groomer. The owners who succeed when they trim a Goldendoodle at home are not the ones who attempt full haircuts from the first session. They are the ones who start with the low-risk, high-reward areas — eyes, paws, sanitary areas — and build skill and the dog’s tolerance gradually. This guide covers what is safe to trim at home, the correct technique and tools for each area, and the honest limits of home trimming for Goldendoodles.
👤 Who This Guide Is For
- You want to maintain tidiness between professional grooming appointments without a full home haircut
- You are considering full DIY grooming and want to understand what is realistic before investing in equipment
- Hair is growing over your dog’s eyes between appointments and you want to trim it safely at home
- You want to reduce professional grooming costs by handling some tasks yourself
⚡ Quick Summary
Trimming a Goldendoodle at home safely means starting with three low-risk areas: the hair around the eyes, the hair between the paw pads, and the sanitary area. These require only blunt-nosed scissors and basic technique. Full body haircuts at home require quality clippers, significant practice, and a dog who is comfortable with the equipment — achievable but a step-by-step progression, not a first-session goal. The tools that matter most are blunt-nosed grooming scissors and a quality clipper with the correct guard combs.
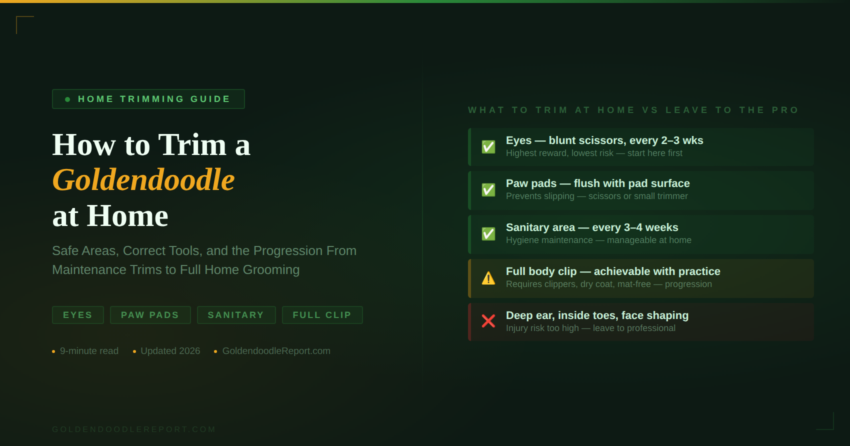
✅ Quick Answer — What Is Safe to Trim at Home
- Eyes: Hair growing over the eyes — safe with blunt-nosed scissors, significant reward ✅
- Paw pads: Hair between pads causing slipping — safe with scissors or small clipper ✅
- Sanitary area: Hair around genitals and anus — important for hygiene, manageable at home ✅
- Ears (exterior): Light tidy of ear fringe — proceed with care ✅
- Full body haircut: Achievable at home with the right tools and practice — but a progression, not a beginner task ⚠️
- Inside ears, between toes (deep): Leave to the professional — injury risk is high ❌
For the complete grooming overview see Goldendoodle Grooming Guide. For professional vs DIY comparison see 👉 Professional vs DIY Goldendoodle Grooming — coming soon.
How to Trim a Goldendoodle at Home — Tools You Need First
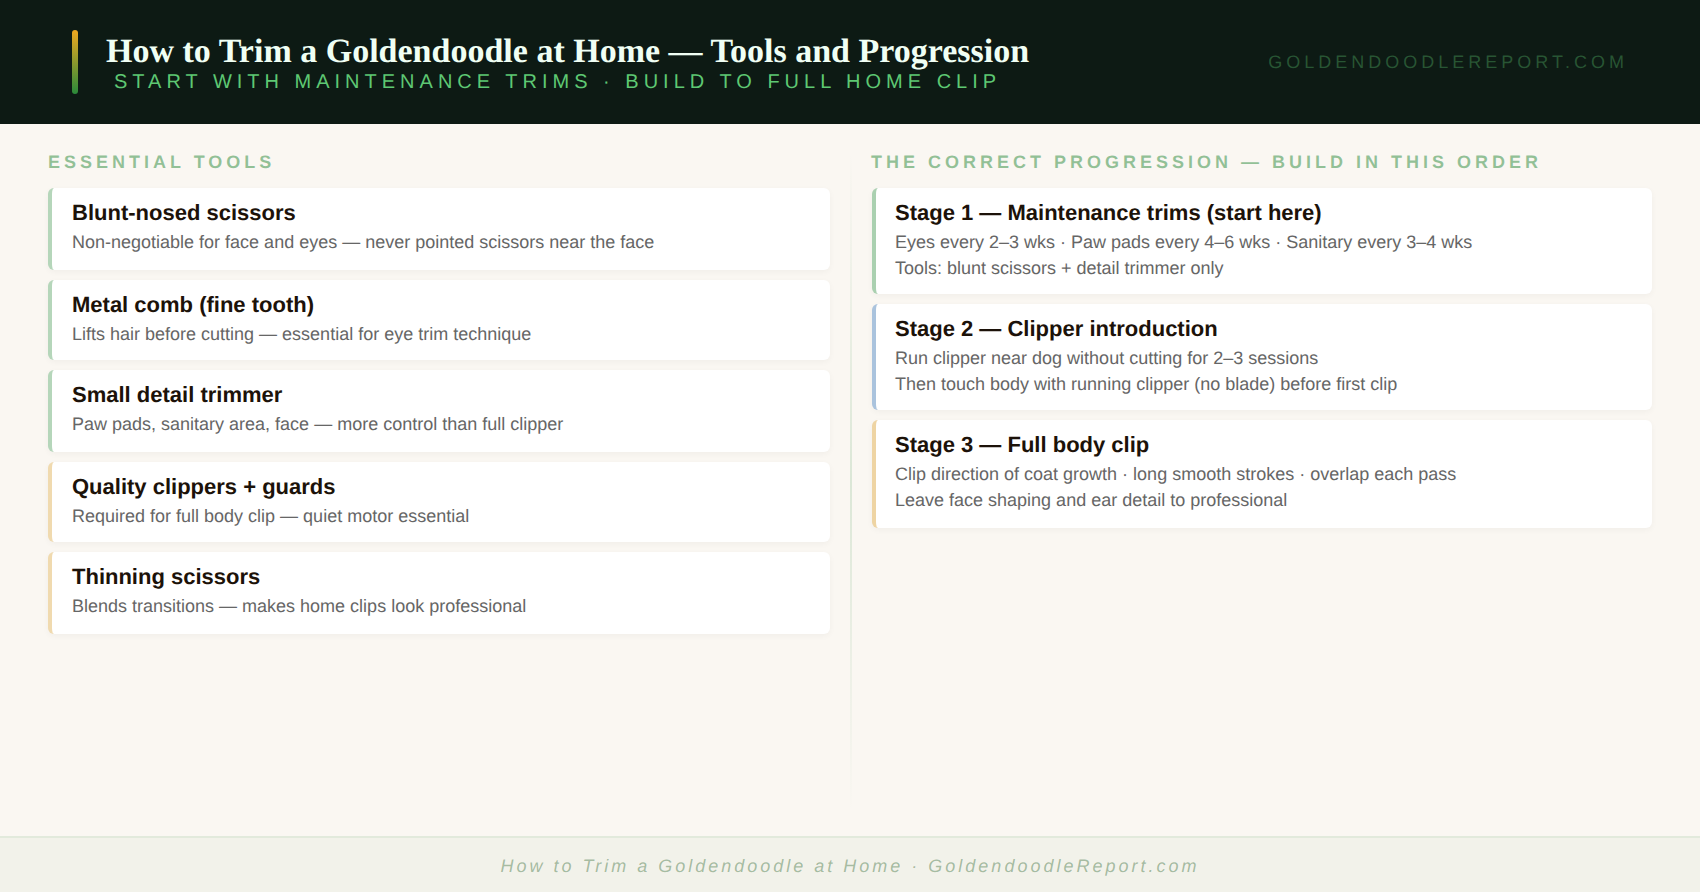
Blunt-nosed grooming scissors — essential
Blunt-nosed scissors — sometimes called safety scissors or rounded-tip scissors — are non-negotiable for any trimming near the eyes, face, or sensitive areas. Standard pointed scissors directed at a dog’s face while the dog moves are a serious injury risk. Blunt tips allow the same cut but eliminate the puncture risk if the dog moves unexpectedly. Every home trimming kit should contain a pair of blunt-nosed scissors before anything else.
Straight grooming scissors — for body work
For trimming body coat, leg coat, and ear fringe, standard straight grooming scissors with a comfortable grip are appropriate. Do not use household scissors — they are not designed for the resistance of dog coat and will fold and pull the coat rather than cut cleanly, causing discomfort.
Thinning scissors — for blending
Thinning scissors have serrated blades that remove bulk without creating a hard scissor line. They are the tool that makes home-trimmed dogs look like they were professionally finished rather than home-cut. Optional for beginners but a significant quality upgrade once basic scissoring is comfortable.
Clippers with guard combs — for body haircuts
Quality clippers are required for full body haircuts at home. The most important specification is quietness — a loud clipper that startles the dog makes every subsequent home grooming session harder. Variable speed and quality blades that do not heat quickly are the other key specifications. Guard combs (snap-on comb attachments) determine the length of cut — having a range of guard sizes gives control over the finished length. See 👉 Best Clippers for Goldendoodles — coming soon.
Small detail clipper or trimmer
A small battery-powered trimmer is useful for paw pads, face, and sanitary areas — areas where a full-sized clipper is too large to manoeuvre accurately. Many owners find a cordless detail trimmer more practical than a full clipper for the maintenance areas that need attention between professional appointments.
Trimming Hair Around the Eyes
This is the highest-reward and lowest-risk home trimming task. Hair growing over the eyes affects the dog’s vision, causes irritation, and in fast-growing coats may need attention every 2–3 weeks between professional appointments.
What you need: Blunt-nosed scissors only. A fine-tooth comb to lift the hair before cutting.
Technique: Sit the dog calmly in front of you. Use the fine-tooth comb to lift the hair above the eye upward and away from the eye surface. Position the blunt-nosed scissors horizontally across the hair above the eye — pointing away from the eye surface, not toward it. Cut along the comb in a straight line, removing enough hair to clear the eye completely. Work one eye at a time. Never direct scissors toward the eye surface — always cut above the eye and across, not downward.
Safety: If the dog is restless, do one eye and stop. Return when the dog is calm rather than restraining an anxious dog with scissors near their face. One eye done safely is better than both eyes done under stress.
For the complete eye area trimming guide see 👉 How to Trim Hair Around Goldendoodle Eyes — coming soon.
Trimming Paw Pads
Hair growing between the paw pads causes two problems: it causes the dog to slip on hard floors because the hair reduces pad-to-floor contact, and it collects dirt and moisture that can irritate the skin between the pads. Paw pad trimming is a practical maintenance task that most owners can manage at home.
What you need: Small scissors or a small detail trimmer.
Technique: Hold the paw firmly but gently. Use your thumb to spread the toes apart slightly, exposing the hair growing between the pads. Trim the hair flush with the pad surface — not shorter, not longer. The goal is hair level with the pad so no hair protrudes between the toes when the foot is flat. Work one toe space at a time. If using scissors rather than a trimmer, use blunt-nosed scissors and keep the blade flat against the pad surface rather than pointing into the toe space.
Safety: The skin between paw pads is thin and sensitive. Keep the trimmer or scissors parallel to the pad surface at all times. Never dig into the toe space — trim only what protrudes at pad level.
For the complete paw pad trimming guide see 👉 How to Trim Goldendoodle Paw Pads — coming soon.
Sanitary Area Trimming
The sanitary area — the hair around the genitals and anus — needs to be kept short for hygiene reasons. Long hair in this area traps waste and creates hygiene problems as well as skin irritation. This is a home trimming task that makes a significant practical difference and is manageable for most owners.
What you need: Small scissors or a detail trimmer.
Technique: With the dog standing, use scissors or a trimmer to remove hair in a roughly 2-inch radius around the anus and genitals. The goal is a clean, close trim that removes the hair trap rather than a cosmetically perfect finish. Work carefully and slowly — the skin in this area is sensitive and the dog may be more resistant here than in other trim areas.
Frequency: Every 3–4 weeks for most dogs, or whenever waste starts to catch in the coat.
How to Trim a Goldendoodle at Home — Attempting a Full Body Haircut
A full body haircut at home is achievable — many owners successfully groom their Goldendoodles entirely at home — but it requires the right tools, a dog who is comfortable with clipper noise and sensation, and realistic expectations about the result compared to professional grooming.
Before attempting a full home haircut
The dog must be fully brushed and mat-free before any clipper work. Clippers dragged through mats pull at the skin and damage the blade. See How to Brush a Goldendoodle for the pre-clip brush-out. The dog must also be bathed and fully dried — clipping a dirty or damp coat produces an uneven result and damages the blades faster.
Introducing clippers to the dog
A dog who has never experienced clippers needs gradual introduction before the first clip. Run the clipper without the blade near the dog during normal activity for several sessions — letting the dog become familiar with the sound without associating it with contact. Then touch the running clipper body (not blade) to the dog’s coat without cutting for a further session or two. Only then begin the actual clip — when the dog is comfortable with the sound and vibration.
Body clipping technique
Clip in the direction of coat growth — not against it. Work in long, smooth strokes rather than short choppy movements. Overlap each stroke slightly to prevent lines. Use the guard comb appropriate for the length you want — a longer guard for more coat retention, a shorter guard for a tighter clip. Keep the blade flat against the coat and the clipper body angled slightly forward rather than perpendicular to the surface.
The areas most commonly done poorly at home are the transitions — neck to body, body to leg, body to head. These blending areas benefit most from thinning scissors after clipping to soften the lines between different length zones.
What to leave to the professional
Face shaping, ear cleaning and plucking, scissor work around the eyes with precision, and the overall balance and symmetry of the finished haircut are the areas where professional skill makes the most visible difference. Many successful home groomers handle the body clip themselves and have a professional finish the face and detail work — a hybrid approach that saves significant cost while maintaining quality where it shows most.
⚠️ Home Trimming Mistakes That Cause Problems
- Using pointed scissors near the face: One unexpected dog movement and a pointed scissor tip becomes a serious eye injury. Only blunt-nosed scissors for any work near the face
- Clipping a matted coat: Clippers pull through mats causing pain and damaging the blade. Always brush and comb-check completely before any clipper work
- Clipping a damp coat: Produces uneven results and damages clipper blades faster. The coat must be completely dry
- Forcing a resistant dog: A dog restrained against their will during trimming becomes increasingly difficult to groom over time. Short positive sessions with breaks are more productive than a complete groom under stress
- Overheated blades: Clipper blades heat up during use. Test the blade against your inner wrist periodically — if it feels hot, cool it before continuing. Hot blades cause clipper burn, a painful skin condition
For authoritative guidance on safe dog grooming at home see the AKC dog grooming guide.
✅ Your Next Step
Start with the eye trim — it is the safest, most visually rewarding, and most frequently needed home trimming task. Once that feels comfortable, add paw pad trimming. Build from there as confidence and the dog’s tolerance develops. The goal is a sustainable home trimming routine that reduces professional grooming costs while maintaining the dog’s comfort and coat quality. For the complete grooming guide see Goldendoodle Grooming Guide.
🔑 Key Takeaways
- Start with the three low-risk, high-reward home trim areas: eyes, paw pads, and sanitary area. These three alone make a significant practical difference and require only blunt-nosed scissors
- Never use pointed scissors near the face — blunt-nosed scissors are non-negotiable for eye and face trimming
- A full body haircut at home is achievable but requires a progression — comfortable with maintenance trims first, then clipper introduction, then body clip
- Always brush completely and confirm mat-free with a metal comb before any clipper work — clippers through mats cause pain and damage the blade
- Short positive sessions with treats build a dog who tolerates home trimming long-term. Forcing through resistance creates increasing difficulty with every future session
- Many owners use a hybrid approach — body clip at home, professional for face and detail work — which saves significant cost while maintaining quality where it shows most
📚 Continue Learning
- Goldendoodle Grooming Guide — the complete grooming authority guide
- How to Brush a Goldendoodle — the essential pre-trim brush-out
- Goldendoodle Grooming Schedule — how home trimming fits into the full schedule
- 👉 How to Trim Hair Around Goldendoodle Eyes — coming soon
- 👉 How to Trim Goldendoodle Paw Pads — coming soon
- 👉 Goldendoodle Haircut Styles — coming soon
- 👉 Best Clippers for Goldendoodles — coming soon
- 👉 Professional vs DIY Goldendoodle Grooming — coming soon
- 👉 Goldendoodle Grooming Mistakes to Avoid — coming soon
↑ Back to: Goldendoodle Grooming Guide | Goldendoodle Grooming — All Articles
Frequently Asked Questions
How to trim a Goldendoodle at home — where do I start?
Yes — but start with the low-risk maintenance areas rather than a full haircut. Eye trimming, paw pad trimming, and sanitary area trimming are all manageable at home with blunt-nosed scissors and basic technique. Full body haircuts at home are achievable but require quality clippers, a dog comfortable with clipper noise, and a gradual skill progression. Most owners who successfully trim a Goldendoodle at home started with maintenance trimming and built from there over several months.
What scissors should I use to trim my Goldendoodle at home?
Blunt-nosed grooming scissors for all work near the face and eyes — never pointed scissors. Straight grooming scissors for body and leg work. Thinning scissors for blending between lengths. Do not use household scissors — they are not designed for dog coat and will fold the hair rather than cut cleanly. The single most important purchase for home trimming is a pair of quality blunt-nosed grooming scissors before anything else.
How do I trim the hair around my Goldendoodle’s eyes at home?
Use a fine-tooth comb to lift the hair above the eye upward away from the eye surface. Position blunt-nosed scissors horizontally above the eye pointing away from the eye — never toward it. Cut along the comb in a straight line, removing enough hair to clear the eye completely. Work one eye at a time and stop if the dog is restless. For the complete technique see 👉 How to Trim Hair Around Goldendoodle Eyes — coming soon.
How often should I trim my Goldendoodle at home between professional appointments?
Eye trimming: every 2–3 weeks for fast-growing coats, as needed for slower-growing coats. Paw pad trimming: every 4–6 weeks or when hair causes slipping on floors. Sanitary area: every 3–4 weeks. Full body trim if doing at home: aligned with the professional grooming schedule — curly coats every 4–6 weeks, wavy coats every 6–8 weeks. The schedule for home trimming depends on coat growth rate, which varies significantly between individual dogs.
Should I trim my Goldendoodle before or after a bath?
For clipper work — always after a bath and after the coat is completely dry. Clipping a dirty or damp coat produces uneven results and damages the clipper blades significantly faster than clipping a clean, dry coat. For maintenance scissors work — eye trimming, paw pad trimming — either before or after a bath is acceptable, though many groomers prefer to do scissor work on a clean coat. The essential requirement is that the coat must be brushed and mat-free regardless of when the trim happens.
Disclaimer: The information in this article is provided for general educational purposes only. King James Adjei is a researcher and enthusiast, not a veterinarian or certified groomer. For health concerns or grooming questions specific to your dog’s condition, consult a qualified veterinarian or professional groomer.