Affiliate Disclosure: Some links in this guide are affiliate links. If you purchase through them, we may earn a small commission at no extra cost to you. Read our full affiliate disclaimer here.
By King James Adjei — Researcher and Goldendoodle enthusiast, founder of GoldendoodleReport.com. Every guide on this site is carefully researched and written to give owners reliable, clearly organised information — updated regularly and honest about uncertainty. → About this site
📖 7-minute read | Last updated April 2026 | Reviewed for accuracy
Knowing how to remove mats safely from a Goldendoodle coat means knowing when to attempt home removal and when to stop and call the groomer. Not all mats can or should be handled at home — and attempting to remove a severe mat with the wrong technique causes pain and skin damage that makes the dog significantly more resistant to grooming in the future. This guide gives you a clear severity triage system, the correct home removal technique for early and mid-stage mats, the tools that work and the ones that cause harm, and the hard stop point beyond which professional intervention is required.
👤 Who This Guide Is For
- You have found a mat on your Goldendoodle and want to know whether you can remove it at home and how
- You want to understand the difference between a mat that can be worked out and one that requires professional help
- Your dog has multiple mats and you want to triage them correctly before deciding what to do
- You want to know which tools are safe to use and which ones cause harm
⚡ Quick Summary
How to remove mats safely depends entirely on the severity. Early-stage tangles and developing mats can be worked out at home using detangling spray, fingers, and a wide-tooth metal comb — working from tip to skin in small increments. Established skin-level mats cannot be safely removed at home and must go to a professional groomer. Never attempt to cut through a mat with scissors — the skin folds into mats and scissor injuries are common even among professionals. The safest home removal tool is your fingers, followed by a wide-tooth comb, followed by a dematting comb for early mats. Never a brush.
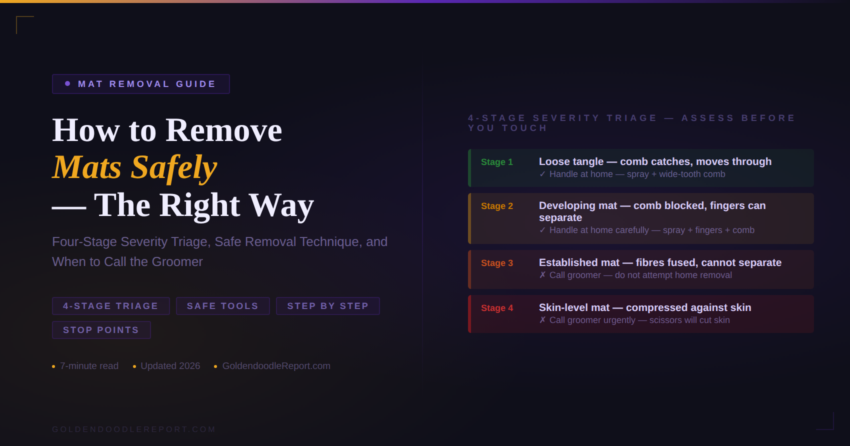
✅ Quick Answer — Mat Severity Triage
- Loose tangle (comb catches but moves through with light resistance): Handle at home — detangling spray + wide-tooth comb, tip to skin
- Developing mat (comb cannot pass but coat still soft and separable with fingers): Handle at home carefully — spray generously + fingers + wide-tooth comb, patience required
- Established mat (compressed, felt-like, coat fibres fused together): Call the groomer — do not attempt home removal
- Skin-level mat (compressed mat sitting against the skin): Call the groomer urgently — attempting home removal causes pain and potential skin injury
For preventing mats from forming see Goldendoodle Matting Prevention. For the brushing technique that finds early mats before they develop see How to Brush a Goldendoodle.
How to Remove Mats Safely — Start With the Four-Stage Severity Assessment
Treating all mats the same is the most common home removal mistake. The technique that works perfectly on an early-stage tangle will cause pain and skin damage on an established skin-level mat. Correct triage — assessing the mat accurately before touching it — is the foundation of safe home mat removal.
Stage 1 — Loose tangle
What it feels like: The metal comb catches when run through the area but moves through with light resistance. The coat fibres in the affected area feel slightly thicker or denser than surrounding coat but are not compressed together. You can separate the area with your fingers fairly easily.
What it looks like: No visible change on the surface coat. Only detectable with the metal comb or by pressing fingers into the coat.
Action: Handle at home. Apply detangling spray, work through with wide-tooth comb from tip to skin. 5–10 minutes.
Stage 2 — Developing mat
What it feels like: The metal comb cannot pass through the area. The coat in the affected area feels compressed and dense but the fibres can still be separated with sustained finger pressure. The mat is not yet fused — you can feel individual sections within it.
What it looks like: A visible thickening in the coat. May be detectable by sight as well as touch, particularly in longer coats.
Action: Handle at home with care and patience. Apply detangling spray generously, work with fingers and wide-tooth comb, tip to skin. 15–30 minutes per mat.
Stage 3 — Established mat
What it feels like: The mat is compressed to the point where individual fibres cannot be separated with fingers. The affected area feels like a solid, slightly stiff pad of fused coat. Pressing into it does not yield — the fibres do not separate.
What it looks like: A clearly visible, solid mass of fused coat. Often larger than it appears from the outside — the visible mat may be the surface of a larger structure extending to the skin.
Action: Contact your groomer. Home removal of an established mat requires cutting or shaving — attempting to comb or pull through it causes significant pain and risks skin damage.
Stage 4 — Skin-level mat
What it feels like: A compressed, solid mat sitting directly against the skin. When you press the mat, you can feel the skin beneath it. The mat may have pulled the skin slightly, causing visible discomfort when touched.
What it looks like: Often hidden from view — skin-level mats are under the surface coat and only found by pushing the coat aside and examining at skin level. The area may appear slightly raised compared to surrounding coat.
Action: Contact your groomer urgently. A skin-level mat cannot be safely removed at home under any circumstances. The skin folds into the mat and scissors or clippers directed at the mat without professional technique will cut the skin.
How to Remove Mats Safely — Tools That Work and Tools That Cause Harm
Safe tools
Your fingers. The safest mat removal tool available. Fingers provide direct feedback about tension and resistance — you can feel immediately when you are pulling on the skin rather than working through the mat. Use fingers to gently tease apart the outer layers of a developing mat from the outside inward before using any tool.
Wide-tooth metal comb. The correct tool for working through tangles and developing mats after fingers have loosened the outer layers. Work from the tip of the mat toward the skin in small increments — never from the skin outward. The wide-tooth end provides enough space between teeth to work through a mat without tearing. See 👉 Best Comb for Goldendoodles — coming soon.
Dematting comb. A comb with serrated or curved teeth designed specifically for working through mats. Effective on early to mid-stage mats. Use with care — dematting combs cut through mat fibres and can cut skin if the mat is close to the skin surface. Only appropriate for Stage 1–2 mats. See 👉 Best Dematting Tool for Goldendoodles — coming soon.
Detangling spray. Applied directly to the mat before and during the removal process. Reduces friction between fibres and makes them easier to separate. Apply generously to the mat, allow 30–60 seconds for it to penetrate, then begin working. Reapply during the process as needed. See 👉 Best Detangler Spray for Goldendoodles — coming soon.
Tools that cause harm
Scissors. Never attempt to cut through a mat with scissors at home. The skin folds into mats — particularly skin-level mats — and scissor injuries are the most common mat-related veterinary presentation in dogs. Even experienced groomers approach skin-level mat removal with clippers rather than scissors specifically because of this risk. If a mat is severe enough to require cutting, it requires a professional with the correct tools and technique.
Slicker brush used to force through mats. Dragging a slicker brush through a mat causes pain and breaks coat fibres rather than separating them. The slicker brush is a maintenance tool — it prevents mats forming in properly maintained coats. It is not a mat removal tool.
Any tool applied with force. Mat removal requires patience and very light pressure throughout. Any time you feel significant resistance or the dog flinches, stop immediately. Forcing through resistance tears coat fibres and pulls on skin — which produces pain, skin damage, and a dog who will be significantly more resistant to all future grooming.
How to Remove Mats Safely at Home — The Exact Step-by-Step Technique
This technique applies to Stage 1 and Stage 2 mats only. If a mat does not respond to this technique within 15–20 minutes of careful work, stop and contact your groomer — the mat is more advanced than it appears and requires professional intervention.
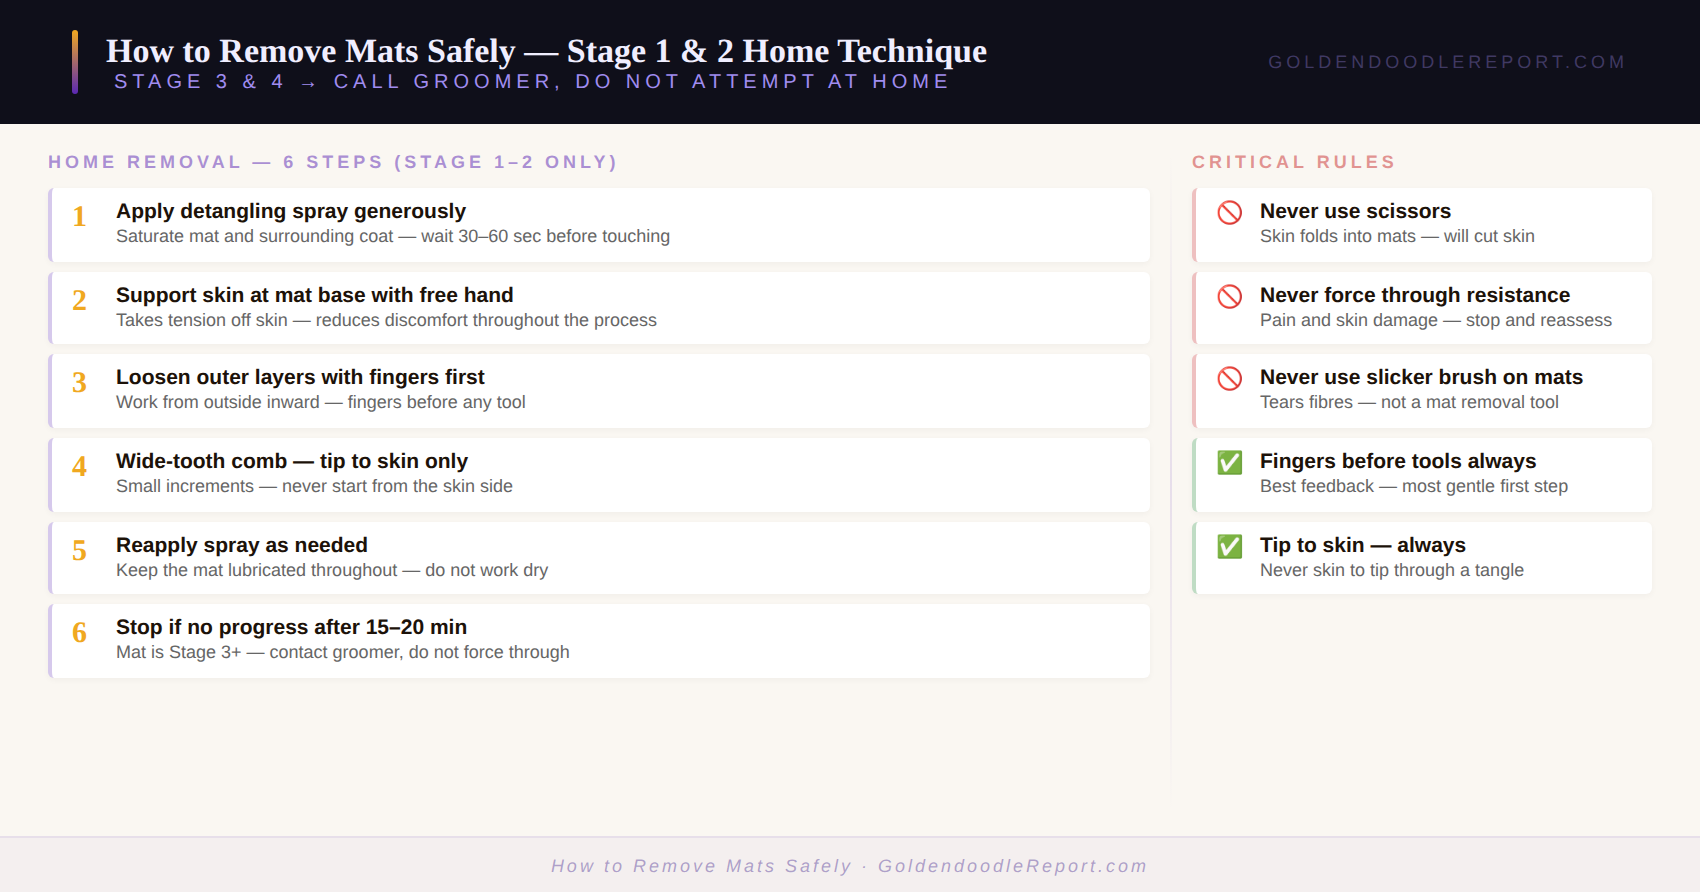
Step 1 — Apply detangling spray generously
Saturate the mat and the coat immediately surrounding it with detangling spray. Allow 30–60 seconds for the spray to penetrate. The goal is to reduce friction between the fibres enough that they can be worked apart without tearing. Do not start working the mat dry — it significantly increases the effort required and the discomfort for the dog.
Step 2 — Support the skin at the base of the mat
Place your free hand flat against the skin at the base of the mat. This is the most important step and the one most often skipped. Supporting the skin means that any tension created during mat removal is taken by your hand rather than the dog’s skin. A dog who feels pulling on their skin will pull away and become anxious — a dog whose skin is supported does not feel the tension of mat removal the same way.
Step 3 — Work the outer layer with fingers first
Before using any tool, use your fingers to gently tease apart the outermost fibres of the mat — working from the outside of the mat inward and from the tip of the fibres toward the skin. This initial loosening with fingers significantly reduces the work required from tools and prevents the mat from being torn rather than separated.
Step 4 — Work through with wide-tooth comb, tip to skin
Once fingers have loosened the outer layer, use the wide-tooth end of the metal comb to work through the mat in small increments. Start at the very tip of the mat — the end furthest from the skin — and work a small section through the comb. Move toward the skin incrementally, never starting from the skin side. Each pass of the comb should move through a small section of the mat freely before you move deeper toward the skin.
Step 5 — Reapply spray and repeat
Reapply detangling spray as needed throughout the process — particularly if the mat feels dry or resistance increases. Work patiently and continuously — not in bursts of effort followed by stops. The dog’s tolerance for mat removal is limited and patient, continuous gentle work achieves more before that tolerance runs out than aggressive bursts.
Step 6 — Stop if the mat does not yield
If after 15–20 minutes of careful work the mat has not responded — the wide-tooth comb still cannot pass through freely and fingers still cannot separate the fibres — stop. The mat is at Stage 3 or beyond and requires professional intervention. Contact your groomer and describe the location and approximate size of the mat. A professional groomer will assess whether the mat can be dematted or whether shaving is required. See 👉 Should You Shave a Matted Goldendoodle? — coming soon for guidance on that decision.
🩺 When to Contact Your Vet — Not Just the Groomer
- The dog shows pain responses beyond the mat area — yelping, snapping, or extreme withdrawal when the area near the mat is touched
- The skin beneath or adjacent to the mat appears red, raw, broken, or has discharge
- The mat area has a smell — which may indicate a skin infection developing beneath the mat
- The dog has been scratching or biting at the mat area and the skin shows signs of self-trauma
Skin infections can develop under severe mats within days. A mat that has been present for weeks without attention warrants a vet check alongside the grooming appointment.
For authoritative guidance on dog grooming safety see the AKC dog grooming guide.
✅ Your Next Step
Assess any mats you have found using the four-stage severity triage above. Stage 1 and 2 — work through using the technique in this guide. Stage 3 and 4 — contact your groomer today. Every day a Stage 3 or 4 mat is left without attention it becomes harder to address and more uncomfortable for the dog. For preventing mats from forming in the first place see Goldendoodle Matting Prevention.
🔑 Key Takeaways
- Not all mats can or should be handled at home — assess severity first using the four-stage triage before touching the mat
- Stage 1 and 2 mats (tangle and developing mat) can be worked out at home using detangling spray, fingers, and a wide-tooth comb — working from tip to skin
- Stage 3 and 4 mats (established and skin-level) require professional grooming — attempting home removal causes pain and risks skin injury
- Never use scissors on a mat at home — the skin folds into mats and scissor injuries are the most common mat-related injury in dogs
- Always support the skin at the base of the mat with your free hand during removal — this takes tension off the skin and significantly reduces discomfort
- If a mat does not respond within 15–20 minutes of careful work, stop and contact your groomer
📚 Continue Learning
- Goldendoodle Grooming Guide — the complete grooming authority guide
- Goldendoodle Matting Prevention — how to stop mats forming in the first place
- How to Brush a Goldendoodle — the technique that catches early mats before they develop
- Goldendoodle Coat Types Explained — how coat type affects mat risk
- 👉 How to Detangle a Goldendoodle Coat — coming soon
- 👉 Should You Shave a Matted Goldendoodle? — coming soon
- 👉 Best Dematting Tool for Goldendoodles — coming soon
- 👉 Best Detangler Spray for Goldendoodles — coming soon
- 👉 Best Comb for Goldendoodles — coming soon
↑ Back to: Goldendoodle Grooming Guide | Goldendoodle Grooming — All Articles
Frequently Asked Questions
How to remove mats safely from a Goldendoodle without causing pain
Safe mat removal starts with assessing severity — only Stage 1 and 2 mats should be attempted at home. Apply detangling spray generously and allow it to penetrate. Support the skin at the base of the mat with your free hand throughout. Use fingers to loosen the outer layers first, then work through with a wide-tooth metal comb from the tip of the mat toward the skin in small increments — never from the skin outward. Work patiently and stop immediately if the dog shows pain responses. If the mat does not yield within 15–20 minutes, stop and contact your groomer.
Can I cut a mat out of my Goldendoodle’s coat with scissors?
No — never use scissors to cut through a mat at home. The skin folds into mats, particularly skin-level mats, and scissors directed at a mat without professional technique will cut the skin. This is the most common mat-related injury in dogs and it happens even to well-intentioned owners. If a mat requires cutting to remove, it requires a professional groomer with clippers and the correct technique to assess where the skin is before cutting.
How to remove mats safely — what is the correct sequence?
The correct sequence is: apply detangling spray generously, support the skin at the mat base with your free hand, use fingers to loosen the outer mat layers, then work through with a wide-tooth metal comb from tip to skin in small increments. For early mats this takes 5–15 minutes. For developing mats this takes 15–30 minutes. For established or skin-level mats — the correct answer is to stop and contact your groomer rather than attempting home removal.
How do I know if a mat is too severe to remove at home?
A mat is too severe for home removal when the coat fibres in the affected area cannot be separated with sustained finger pressure — when the mat feels like a solid, fused pad rather than dense but separable fibres. If you press your fingers into the mat and the fibres do not move or separate at all, it is a Stage 3 or 4 mat and requires professional intervention. Another reliable test: if 15–20 minutes of careful work with detangling spray and a wide-tooth comb produces no progress, the mat is beyond home management.
What happens if I leave a mat untreated?
An untreated mat progresses through the four stages continuously — a loose tangle becomes a developing mat becomes an established mat becomes a skin-level mat. Skin-level mats pull on the skin constantly, causing chronic discomfort. In severe cases they can restrict blood flow to the skin beneath. They also create a warm, moist environment that is ideal for bacterial and yeast infections — which is why neglected mats sometimes smell and the skin beneath them appears red or raw. An untreated mat does not resolve on its own — it worsens every day.
Disclaimer: The information in this article is provided for general educational purposes only. King James Adjei is a researcher and enthusiast, not a veterinarian or certified groomer. For health concerns, skin conditions beneath mats, or severe matting situations, always consult a qualified veterinarian or professional groomer.