Affiliate Disclosure: Some links in this guide are affiliate links. If you purchase through them, we may earn a small commission at no extra cost to you. This does not influence our recommendations. Read our full affiliate disclaimer here.
By King James Adjei — Researcher and Goldendoodle enthusiast, founder of GoldendoodleReport.com. Every guide on this site is carefully researched and written to give owners reliable, clearly organised information. → About this site
📖 8-minute read | Last updated May 2026 | Reviewed for accuracy
Learning to teach a Goldendoodle to drop it is the natural companion to leave it — where leave it prevents your dog from picking something up in the first place, drop it handles the moment after they already have it in their mouth. Every dog eventually grabs something they shouldn’t, and a reliable drop it turns a potential standoff or chase into a calm, cooperative exchange instead.
This guide covers the trade method and the psychology behind why it works better than forcing a dog’s mouth open, the specific fix for dogs who turn dropping into a game of keep-away, and a separate technique for the rare moment an item is genuinely dangerous.
✅ Quick Answer
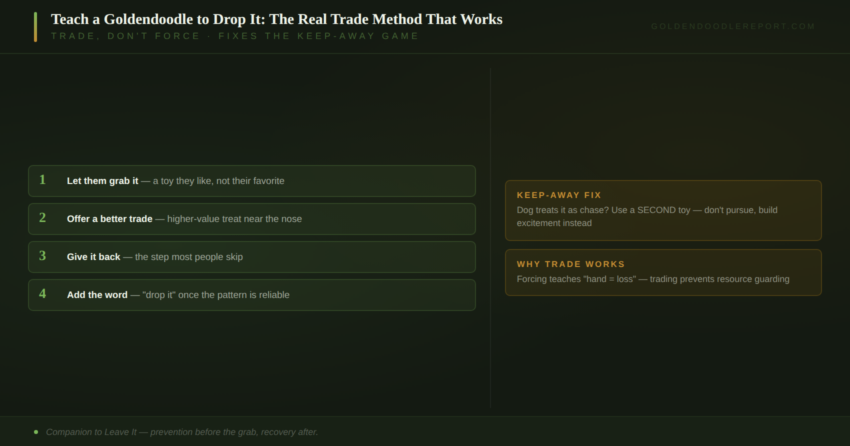
To teach a Goldendoodle to drop it, offer a toy your dog likes but doesn’t love, and once they have it in their mouth, present a high-value treat near their nose. The instant they let go to take the treat, mark the moment, praise, and give the item back — this “trade” teaches your dog that releasing something leads to good things, not loss. Add the verbal cue “drop it” once the pattern is reliable. Most Goldendoodles learn the basic concept within a handful of sessions, though full reliability with genuinely exciting items takes several weeks of consistent practice across different situations.
👤 Who This Guide Is For
- Your Goldendoodle already knows leave it and you’re ready for the companion command
- Your dog grabs an item and immediately runs off, turning it into a game of chase
- You’ve tried prying items out of your dog’s mouth and want a better, cooperative method
- You want to understand the difference between drop it and leave it, and whether you need both
📊 Quick Facts — Teaching a Goldendoodle to Drop It
- “Drop it” applies after an item is already in your dog’s mouth; “leave it” applies before they’ve picked it up — related but distinct commands
- The trade method — releasing an item leads to something better, not loss — is more effective long-term than prying a dog’s mouth open, and helps prevent resource guarding from developing
- Dogs that turn dropping into a chase game are usually responding to an accidental pattern where grabbing led to a fun game of keep-away in the past
- Dogs do not generalise well — a drop it that works reliably at home needs deliberate practice in the yard, on walks, and other locations before it can be trusted there too
- Goldendoodles, being both food and play motivated, often respond especially well to trade-based training once the pattern is established
🔍 Quick Diagnosis — What’s Actually Going Wrong?
- If your dog grabs something and immediately runs off to keep it away from you → this is the keep-away pattern covered below; a single-item trade often isn’t enough, try the two-item version
- If your dog won’t release an item even for a treat → the treat may not be high-value enough relative to the item, or your dog may need the item to be lower-value to start with; begin training with something they like but don’t love
- If drop it works at home but not outside → the same proofing gap covered throughout this series; practice deliberately in new locations before expecting reliability there
- If your dog seems anxious or guards items when you approach → this may point toward resource guarding developing; the trade method specifically helps prevent this, and consistency is key going forward
📋 Table of Contents
The Trade Method — Step by Step
- Start with a toy your dog likes but doesn’t love. Avoid their absolute favorite item for early training — set them up to succeed, not struggle.
- Let them pick it up. Offer the toy and let your dog take it in their mouth naturally.
- Present a higher-value treat near their nose. Not directly in front of the toy — close enough that they notice, without needing to drop the toy just to reach it.
- Wait for the release. The instant your dog lets go to take the treat, mark the moment with a clicker or “yes.”
- Give the treat, then return the toy. This is the key step most people skip — give the item back after the trade, so your dog learns that releasing something doesn’t mean losing it permanently.
- Add the verbal cue. Once the pattern is reliable, say “drop it” right before presenting the treat.
- Practice without the treat visible. Say the cue first, then reward from a pocket or pouch once your dog releases, gradually reducing reliance on seeing the treat in advance.
📖 Real Scenario
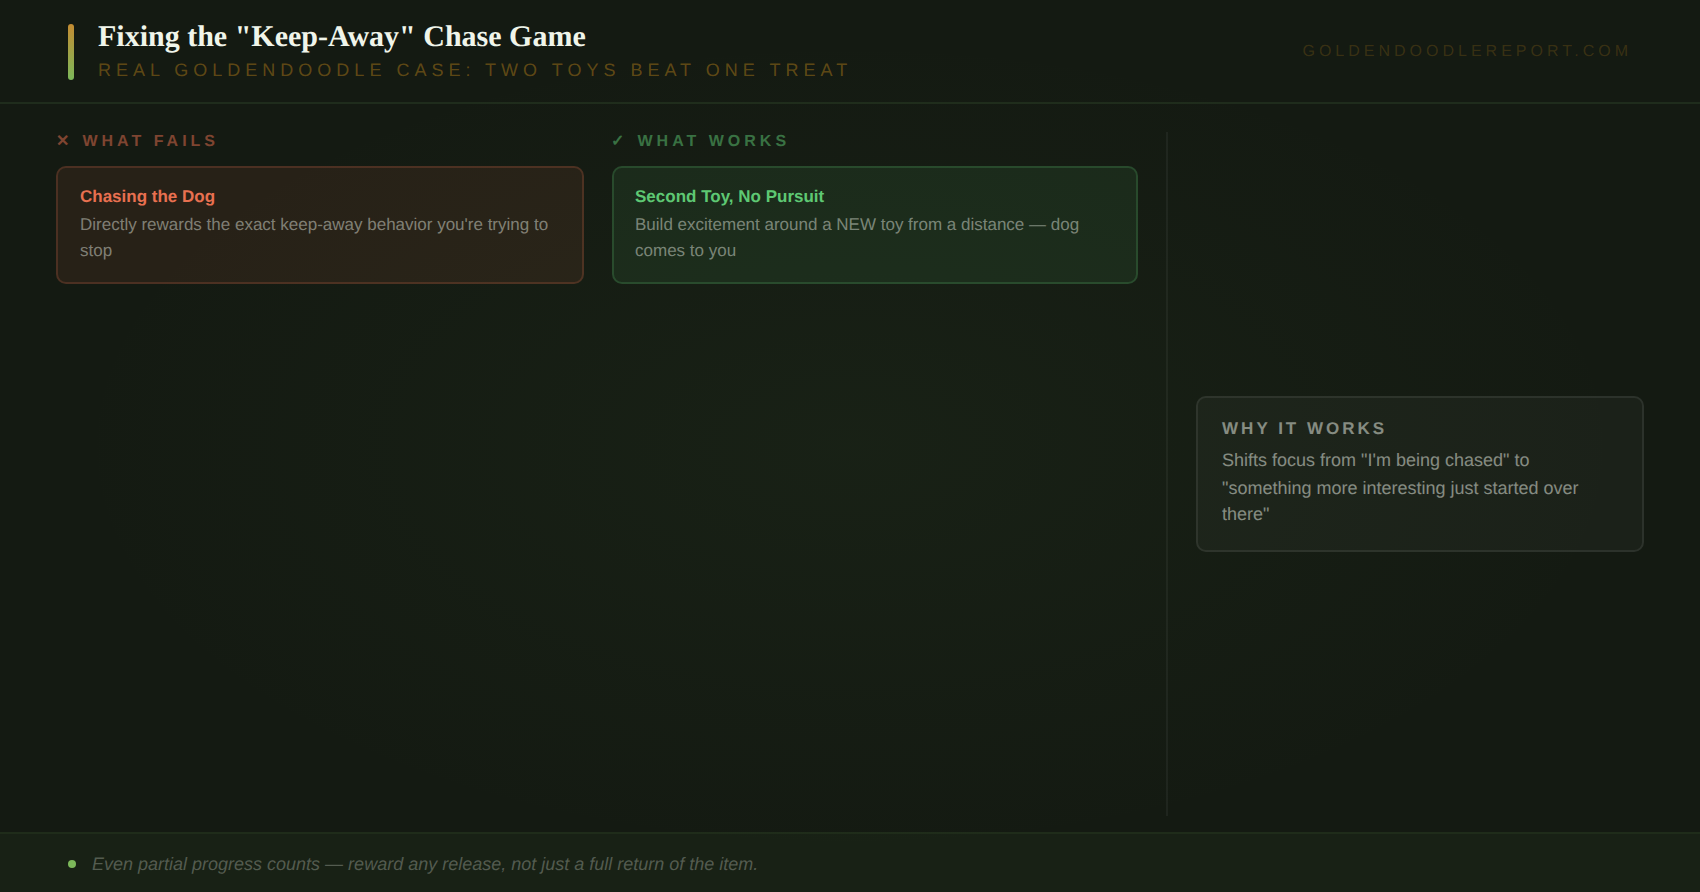
A Goldendoodle owner throws a toy for their dog, who grabs it and immediately starts prancing around just out of reach, clearly treating the whole thing as a game of keep-away rather than fetch. The owner tries offering a treat, but the dog won’t come close enough to trade — the game has become more rewarding than the treat. What worked in a documented real case wasn’t a better treat, but a second toy. The owner grabbed a second, equally exciting toy and got visibly, audibly excited about it themselves — not chasing the dog, just building anticipation around the new toy.
Within a few repetitions, the dog started glancing back and forth between the toy they had and the one the owner was making a fuss over, and eventually dropped the first one to get in on the new toy’s excitement. Over repeated sessions, even when the dog didn’t bring the first toy all the way back, the owner kept rewarding any release with the second toy — breaking the “grab it and run” habit entirely within about a week of short, consistent sessions.
Why Trading Works Better Than Forcing
Prying a dog’s mouth open, or physically forcing an item away, solves the immediate problem but creates a longer-term one: it teaches a dog that an approaching hand near something they have means the item is about to be taken away. Over time, this can encourage exactly the opposite of what you want — a dog that grips tighter, runs further, or in some cases begins resource guarding, a well-documented behavior pattern in which a dog uses avoidance, threatening, or aggressive behaviors to retain control of an item.
The trade method works because it applies genuine positive reinforcement — it reframes the entire interaction. Instead of “give this up or it gets taken,” the dog learns “releasing this brings something better, and I often get it back anyway.” This builds trust around the exchange itself, which is also one of the most effective ways to prevent resource guarding from developing in the first place — a dog who’s never learned that an approaching hand means loss has little reason to guard.
Fixing the “Keep-Away” Problem
Some dogs, once they’ve grabbed something, treat the whole interaction as a chase game rather than an opportunity to trade — prancing just out of reach, clearly enjoying the pursuit more than the item itself. Chasing a dog in this state almost always makes it worse, since it directly rewards exactly the behavior you’re trying to stop.
The two-item version of the trade method, shown in the Real Scenario above, tends to work better for dogs already in this pattern than a single treat does. Rather than trying to lure the dog back to you, build excitement around a second toy from a distance — genuinely enthusiastic, animated energy directed at the new toy, not at the dog. This shifts the dog’s focus from “I’m being chased, better keep running” to “something more interesting just started over there,” which naturally draws them back in without any pursuit at all.
The Emergency Technique for Genuinely Dangerous Items
Routine training builds the skill for everyday situations, but a genuinely dangerous item — something toxic, sharp, or a choking hazard — calls for immediate action rather than a full training sequence in the moment.
Place a piece of food near your dog rather than reaching directly for the item. When they move toward the food to eat it, place a second piece of food further away, giving you a safe window to retrieve the dangerous item while their attention is elsewhere. This isn’t a substitute for training a genuine drop it cue — it’s a practical fallback for the specific moment something urgent happens before that training is fully reliable, or with any dog regardless of training level when speed matters more than technique.
💡 What This Guide Adds That Most Others Don’t
Most drop it guides describe the basic trade mechanics well but stop there. This guide adds the psychological reasoning behind why trading outperforms forcing over the long term, a real documented two-toy solution for dogs who’ve turned dropping into a chase game — more specific and effective than a single treat for dogs already in that pattern — and a separate emergency technique for genuinely dangerous items, distinct from routine training.
Drop It vs. Leave It — Do You Need Both?
Yes — these are genuinely complementary, not interchangeable. “Leave it”, covered in our dedicated Leave It guide, applies before your dog has picked something up. “Drop it” applies after — when leave it wasn’t given in time, or wasn’t heeded. Together, they cover both sides of the same safety-relevant skill: prevention and recovery.
What Most People Get Wrong
- Prying the mouth open — solves the immediate moment but can create guarding behavior and a dog that grips tighter next time
- Chasing a dog that’s keeping away — this directly rewards and reinforces the exact behavior you’re trying to eliminate
- Never giving the item back — if every trade means permanent loss, dogs become less willing to release things over time; give it back when the item is safe to do so
- Starting training with the highest-value item your dog owns — this sets the exercise up to fail; begin with something they like but don’t love
- Assuming home reliability transfers everywhere — the same proofing gap that runs through every command in this series; drop it needs deliberate practice in new locations too
✔️ Action Plan — Your First Training Week
- Choose a toy your dog likes but doesn’t love for early sessions
- Practice the trade method several times daily, always giving the item back afterward
- Add the verbal cue once the pattern is reliable without it
- If your dog turns dropping into a chase game, switch to the two-toy method rather than repeating a failing single-treat approach
- Begin proofing in a second location by the end of the week
⏱️ What to Expect
Most Goldendoodles grasp the basic trade concept within a handful of sessions, often within the first few days. The keep-away pattern, when present, typically resolves within about a week using the two-toy method with consistent practice. Full reliability with genuinely high-value items and in varied real-world locations follows the same several-week proofing timeline covered throughout this series.
✅ Your Next Step
With drop it complete, your Goldendoodle now has all six foundational commands — Sit, Stay, Come, Down, Leave It, and Drop It. From here, the natural next step is Goldendoodle Puppy Training Timeline (coming soon), which sequences these commands alongside the broader socialization and development milestones of the first year.
🔑 Key Takeaways
- The trade method — release leads to something better, then the item often comes back — outperforms forcing a dog’s mouth open over the long term
- Trading regularly helps prevent resource guarding by building trust around an approaching hand near a held item
- Dogs that turn dropping into a chase game usually respond better to a two-toy trade than a single treat
- A genuinely dangerous item calls for the food-redirect emergency technique, not a full training sequence in the moment
- Drop it and leave it are complementary, not interchangeable — prevention before the item is grabbed, recovery after
- Never make every trade a permanent loss — giving safe items back keeps your dog willing to release things in the future
📚 More Goldendoodle Training & Behavior Guides
- Teach a Goldendoodle to Sit: The Exact Method That Actually Works
- Teach a Goldendoodle to Stay: The Real Method That Actually Sticks
- Teach a Goldendoodle to Come: The Proven Recall That’s Actually Reliable
- Teach a Goldendoodle to Lie Down: The Exact Method That Keeps Them Calm
- Teach a Goldendoodle to Leave It: The Exact Method That Keeps Them Safe
- Goldendoodle Puppy Training Timeline — coming soon
- Goldendoodle Training Guide (complete pillar) — coming soon
Browse all guides: Goldendoodle Training & Behavior category
🔗 Related Guides Across the Site
- Goldendoodle Treats Guide — finding high-value treats that beat exciting distractions
- Goldendoodle Puppy Care Guide — where training fits into overall first-year care
Frequently Asked Questions
How do I teach a Goldendoodle to drop it?
Offer a toy your dog likes but doesn’t love, and once they have it, present a higher-value treat near their nose. The instant they release the toy to take the treat, mark the moment, praise, and give the toy back. This “trade” teaches your dog that releasing something leads to good things. Add the verbal cue once the pattern is reliable without it.
Why does my Goldendoodle turn drop it into a chase game?
This usually happens when grabbing an item has accidentally become associated with a fun game of keep-away in the past. Chasing your dog reinforces this pattern further. A two-toy trade — building excitement around a second toy from a distance rather than pursuing — tends to work better than a single treat for dogs already in this pattern.
What’s the difference between drop it and leave it?
“Leave it” applies before your dog has picked something up — prevention. “Drop it” applies after — recovery, when leave it wasn’t given in time or wasn’t heeded. Most trainers recommend teaching both, since they cover different moments.
Should I always give the item back after a trade?
When the item is safe, yes. If every trade means permanent loss, dogs become less willing to release things over time, since there’s no upside to cooperating. Reserve permanently keeping an item for situations where it’s genuinely unsafe or off-limits.
What should I do if my dog has something dangerous in their mouth right now?
Place a piece of food near your dog rather than reaching directly for the item — when they move toward the food, place a second piece further away to create a safe window to retrieve the item. If the item may already be causing harm or your dog shows signs of distress, contact your veterinarian or an emergency animal poison control service immediately.
Disclaimer: The information in this article is provided for general educational purposes only. King James Adjei is a researcher and enthusiast, not a professional dog trainer or veterinarian. If your dog has ingested something potentially toxic or dangerous, contact your veterinarian or an emergency animal poison control service immediately rather than relying on training. Training methods should always be force-free and adjusted to your individual dog’s comfort and pace.